

Hey all!
Well, a friend came by last night, and we got in the second piece of the Battle of Alain Valley!
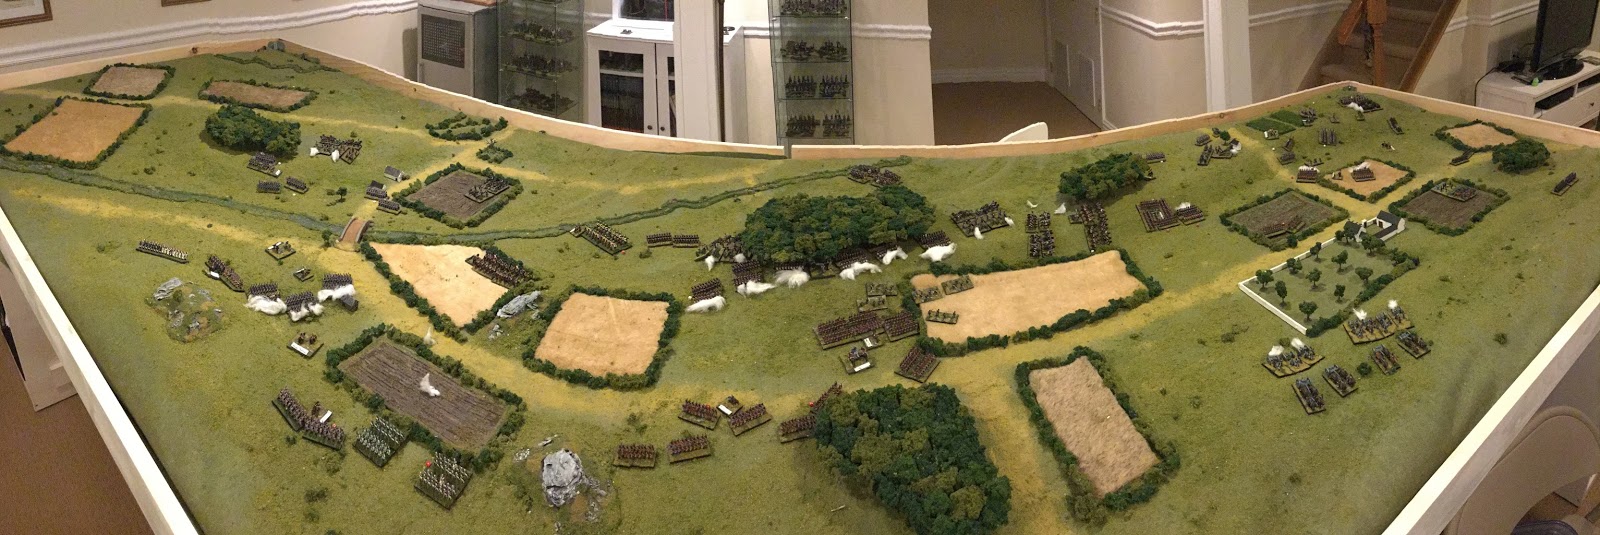
As you can see above, there are two corps involved, three divisions apiece. On the left of the photo (British point of view) one French division is about to cross the river to hit the fragile Spanish division. In the center, the French Old Guard are advancing up to (and over) the hill to meet a large British division head on. On the right, the British and Brunswick brigade tried to turn the French flank, but the attack has stalled as the British cavalry support was routed.

The Old Guard advance a bit in the middle, but run into the British firepower. The British stay in line to maximize their firing power, whereas the French get into column to maximize their morale.

Meanwhile, on the British left flank, the French columns begin to cross the river, harassed the whole way by Spanish skirmishers. One Spanish brigade forms up on a steep hill, prepared to meet the French.

Here is a table shot of the next turn.

On the British right, the Brunswickers form line and exchange fire with the advancing French columns.

On the British left, the Spanish begin to pour fire down into the French columns as they advance up the hill.

And in the center, the Old Guard get a little packed in, and the front columns of the advance begin to take horrific casualties. They do manage to stay steady, but the commander begins to question his advance.

Here is the next turn.

The French attack on the British left continues, and the two sides pour fire into each other. The Spanish, who are rather brittle, manage to inflict some casualties on the French, but it doesn't seem like enough.

Nearer the British right, the Guards Brigade advances, looking to split the French line in half. The French pour fire down the ridge at the advancing British.

And here is the next turn!

In the center the British continue pressing forward, and the Old Guard begins to pull their right flank back a bit, worried that their second Guard brigade advanced too far...

And the center becomes a mess, as the commander of one British brigade (the one in column on the right) surges forward, ignoring the orders of the Duke of Wellington and charging his men forward!
Here is the last turn.

The French center is under such pressure that Napoleon himself comes to the edge of the wood, to urge his Old Guard on!

And while in practice that doesn't have any game play impact, it sure seems to work this time! The ENTIRE left flank of the British attack collapses under the fire of the Guard! Three battalions of British infantry rout, despite the fact that they haven't taken terrible casualties yet, while the Old Guard stand fast, despite the fact that two battalions have taken horrific casualties!

Meanwhile, on the British right, the cavalry is finally forced to charge the Brunswick square securing the far flank of the army... otherwise they might be sitting the whole fight out! Dozens of Brunswickers are dead and dying, and the square begins to falter...

It looks like it will take one more day to finish this one up... and I'll take photos when we do!
3 comments:
Damend inmpressive game and shame that the British fled before French fire;)
Looks fantastic! Great job. But tell me, is that British Light Dragoons that you have attacking the Brunswick square?!? Also, is having the stands facing particular ways indicate some form of status? Both the cavalry and the square have figures pointing in unexpected directions.
Sorry my OCD kicks in every so often.
Amazing pictures! Love the 10mm figures for mass effect and "realistic" photos...excellent!
Post a Comment