Well, a like-minded recently made friend came up, and we knocked off the start of the large scale 10mm Napoleonic war-game: the Battle of the Alain Valley!
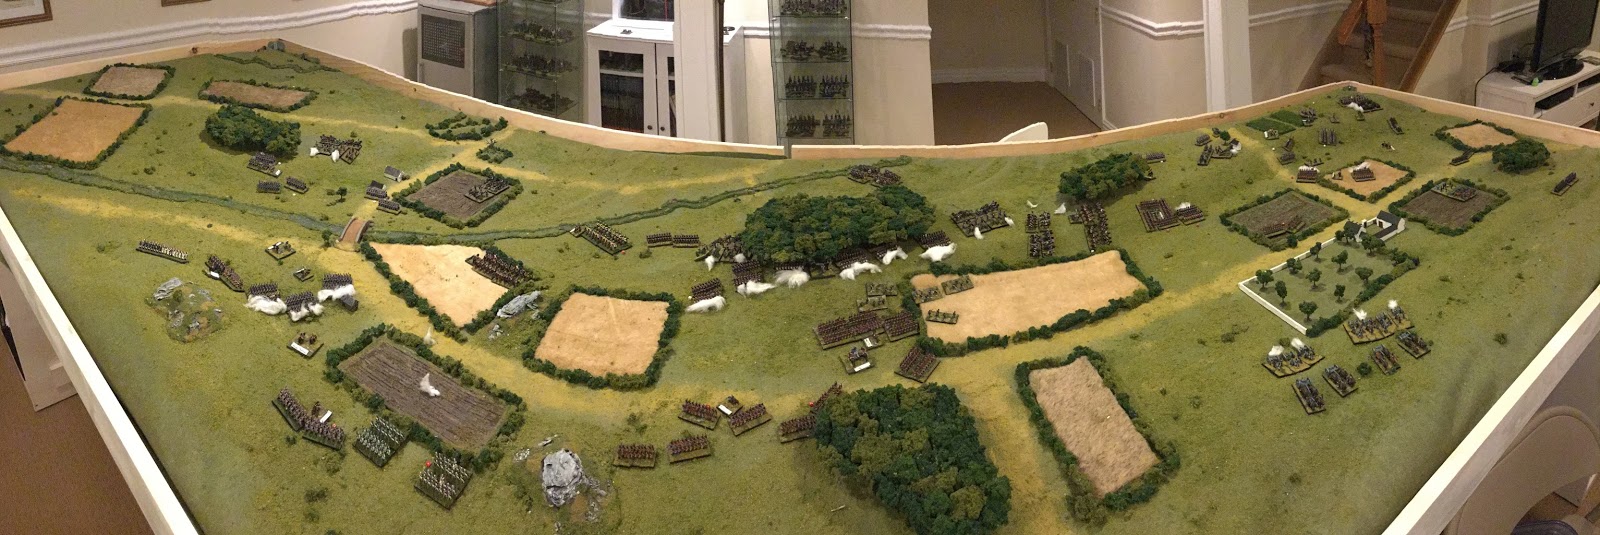
I'll take some more photos (still learning how to photograph in this space, especially on such a big table!) but I'll write a bit! Above is a photo at the end of turn one or so.
So... three divisions per side. We rolled up where they would come on the table. The French I Division, under Napoleon himself, is almost entirely Guard. Originally they were stacked in a corner where they didn't feel as useful, so instead they were deployed to the center, although they were delayed several turns because of it. The French II Division was primarily infantry and one large group of cavalry. The two infantry brigade commanders both had low quality staff ratings, so they would have to be kept close to their division commander, Marshal Ney. They came on on the left of the above photo. The French III Division came in on the right of the above photo, and consisted of mainly infantry, with some cavalry and horse artillery as support.
The British came in with a similar deployment... the Spanish Division on the left of the above photo, Wellington coming in at the center (again a modified deployment, so he would come on in later turns) and the 3rd Division (including the Brunswickers) coming in on the right hand side.
Here is the French III Division, with the two sub-par commanders, Dominique and Coulet, meeting with Ney as their men advance onto the field on the French right.
Opposite them, General Martinez advances with his Spanish Division.
On the far side of the field, Picton brings his 3rd Division onto the field. His cavalry commander, McDonald, has one of the best staffs on the field, so can operate far away from Picton and still be reliable.
Opposite Picton is the French III Division.
Here the French III Division faces off with the British 3rd Division. The French actually ended up deploying down into the valley to try to bring their guns to bear and try to slow down the British advance a bit... in fact, a converged unit of Voltigeurs even ran down towards the chateau on the British side of the field to act as a bulwark against the advancing British!
Picton sends his cavalry off to the flank, where their superior numbers are hoped to be able to overwhelm the French cavalry there. Meanwhile a brigade of British infantry under General Harper advance.
On the other side of the field, the large cavalry brigade under General Roi are send across the river, away from Ney. Roi has a capable staff and can operate further away... but will he head towards the center of the field to prepare for the arrival of Wellington's corps, or will they circle back to threaten the Spanish?
The French III and British 3rd face off, the cavalry trying to protect the flanks... but McDonald throws his numerically superior cavalry forward at the French cavalry... time to bloody the sabers!
Meanwhile the infantry for both divisions prepares to face off.
On the other side of the field, the Spanish cavalry extends out, trying to screen the flank in case the French cavalry gets across the river and threatens them. However, this allows the French artillery to begin pounding on them.
Then the two missing divisions appear. Napoleon brings in the Guards, as Roi's cavalry fords the stream ahead of him.
Here is the table at the end of turn three. You can see that the Spanish are largely holding along the river on the left of the photo, their cavalry having fallen back a bit. The French across from them are deploying and preparing their artillery to pound on the Spanish (who have none that can respond.) Napoleon's Guard advance on the far side of the river, while Wellington has brought on his Division in the foreground. Meanwhile on the right of the photo Picton's 3rd Division is facing the French, who have swung down from the ridge to link up with the chateau, but that is a dangerous position, now that Wellington has arrived at the center...
Here is the French III, facing the Spanish across the river. Unfortunately the two subpar commanders do stall a bit, worried maybe about where they should deploy or not quite understanding their orders... but it doesn't hurt them too much.
Another shot of that part of the field. You can see the French cavalry under Roi advancing towards the Spanish... apparently they have plans to clear this side of the field!
Meanwhile McDonald's cavalry swung up and attacked the British flank, but was THROWN back terribly, suffering casualties! Even though McDonald outnumbered the French cavalry they couldn't win... while the light cavalry is still in a swirling melee, the heavy British cavalry is in disarray, and has taken casualties! Whichever side wins the cavalry battle on this flank will get a huge advantage!
And it won't be the British, as the Scots Greys rout off the field, the British Light Dragoons are still fighting but taking terrible casualties, and the British Dragoon Guards take huge casualties. Anticipating a disaster (as the two French cavalry units seem poised to take over this side of the field)
Here is the next turn... you can see the Spanish are under a bit of pressure on the left of the picture! Unfortunately for the French, the Old Guard crossing the river stalled badly. Thankfully for them, so did Wellington's 1st Division, as two difference brigade commanders failed their orders roll, with one holding in place!
General Cornwall takes shelter in a square of Brunswickers on the far flank of the British army.
At the chateau the converged French Voltigeurs continue holding on, despite being cut off from their brigade and taking casualties...
Here you can see them under attack, with a unit of British horse artillery unlimbering and pouring fire into the chateau, along with a brigade of British infantry pressing them. Unfortunately for the French two or three of the infantry battalions saw this and broke without ever coming under fire themselves! Terrible, terrible rolls (a BUNCH of 1s in a row) but who knows... could be green troops who've never seen friends come under fire so badly?
Here is a shot of the table at this point... you can see half a brigade of the French III routing on the right of the photo, and the swirling cavalry melee on the left, as the French try to beat off the Spanish cavalry...
In the center of the field, the Old Guard march through the trees...
.... and emerge on the big ridge in the center, facing a large British force heading their way!
The Spanish, beaten and smashed by French artillery across the river, throw out skirmishers as the French prepare to make a difficult crossing.
There is a HUGE cavalry melee in front of the Spanish, as the French try to take advantage of their superior numbers and quality, but amazingly the French cuirassiers are beaten back by their heavy Spanish counterparts, and rout out of the picture! The Spanish light cavalry is hammered, though, and drop back (in blue above) causing their friendly infantry to hurriedly form square as suddenly their is French cavalry directly to their front!
And here is where it stands now!
I'll have more when we play again... although I might carefully take a few money shots before then:)